When you launch an EC2 instance, you can use the user-data to bootstrap a instance creation script.
We can use the following code to start a web server and echo out it’s instance id:
#!/bin/bash
yum update -y
yum install -y httpd
systemctl start httpd
systemctl enable httpd
echo "<h1>Hello World from $(hostname -f)</h1>" > /var/www/html/index.html
Steps to create a new bootstrapped instance
Step 1 – Launch a new instance
Login to your EC2 console and click Launch instances.
Select an Amazon Machine Image (AMI). We will select Amazon Linux 2.
Choose an instance type from the list. We will use a Free Tier Eligible t2.micro. Click Next.
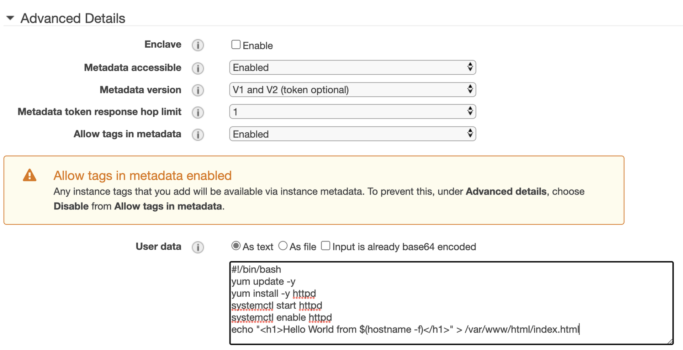
Keep all the options as default and scroll to the bottom of the page. In the User Data textfield, enter the following code snippet:
#!/bin/bash
yum update -y
yum install -y httpd
systemctl start httpd
systemctl enable httpd
echo "<h1>Hello World from $(hostname -f)</h1>" > /var/www/html/index.html
Click Next.
Do not change any Storage options, and click Next.
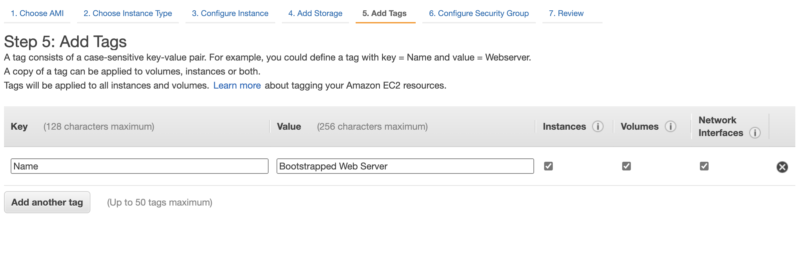
Step 2 – Add tags
Click Add Tag and enter a Key of Name and a value of Bootstrapped Web Server
Click Next.
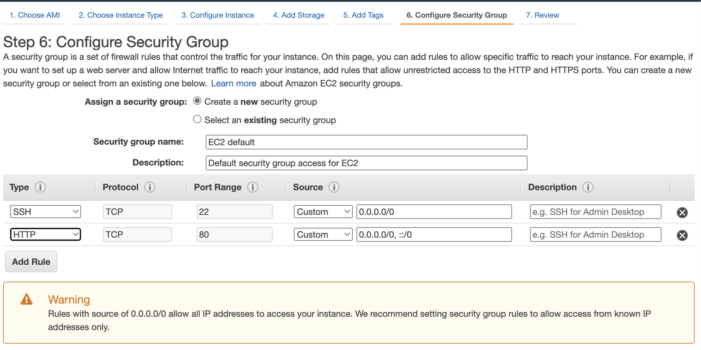
Step 3 – Create a security group
Select Create a new security group and give it a name and description of EC2 default and Default security group access for EC2 respectively.
Click Add Rule and change the Type to HTTP.
Click Review and Launch.
Click Launch.
Step 4 – Create and download a key pair
Create a new key pair from the first dropdown and give it a name of EC2 Instance.
Click Download Key Pair and keep it safe. As this is the only time you will ever be able to download it.
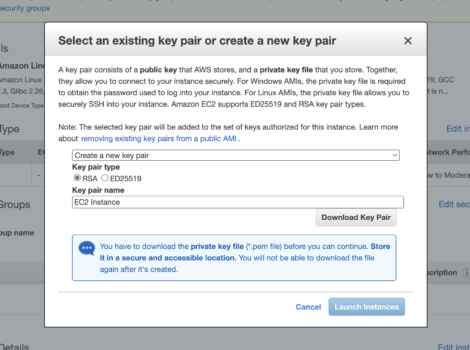
Once downloaded, click Launch Instances.
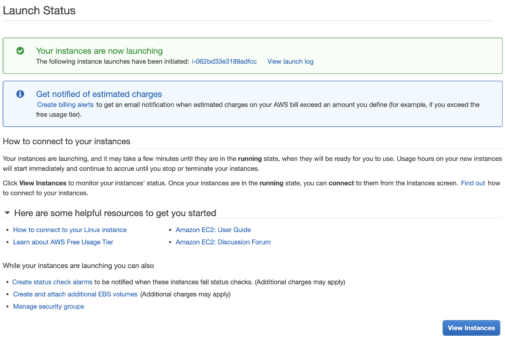
Step 5 – View the instance
On the Status Page, click on the instance id that is shown at the top.
In the below example, the instance id is i-062bd33e3189adfcc.
After a few seconds, you will see the new instance up and running.
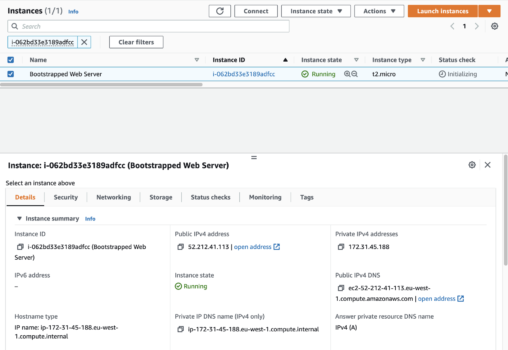
Copy the Public IPv4 address and open a new browser tab/window and paste it in the address bar.

The instance is now up and running and serving HTTP traffic on port 80.